How to delete Facebook search history on any device (mobile and desktop)


Facebook keeps a log of your recent searches made inside the platform. It’s convenient, but the company can use that search data to personalize the content it shows you in your search results. The good news is you can delete your Facebook search history at any time, and it’ll only take a few minutes. This guide walks you through how to do that on both mobile and desktop, explains the benefits of doing so, and includes practical privacy advice.
Why should you delete your Facebook search history?
Clearing your Facebook search history can give you a small privacy boost. It may help reduce the influence of past searches on the content you see when you search, and it prevents anyone with access to your device from seeing what you’ve looked up.
What Facebook tracks in your searches
Along with the searches themselves, Facebook stores related details to those searches, such as the type of device you used or your location at the time you searched.
Learn more: For more information on Facebook’s tracking methods, read our guide on whether Facebook listens to you.
How long does Facebook store search data?
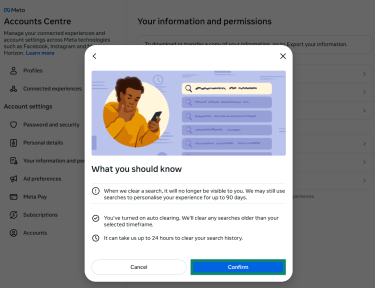
Facebook stores your search history until you manually remove it or delete your account, according to its Privacy policy. When you remove a search entry, it’s no longer shown in your history, but Facebook may still use the underlying data to personalize your search experience for up to 90 days.
Anything you leave in your history remains in your account for up to a year, though Facebook deletes some details tied to that search, such as your device or location, after six months.
If you choose to delete your Facebook account instead, it can take up to 120 days to delete your information from its main systems. In some rare cases, such as legal or safety concerns, your data may still be stored after you delete your account.
Risks of keeping your search history
Keeping your search history isn’t inherently risky, but it means Facebook can continue using your past searches as part of the activity it relies on to shape the content you see in your search results.
Because those searches stay in your account up to a year or until you delete them, they can build up over time and reveal more about your interests or habits than you might expect. And if someone gets into your logged-in Facebook account, they can scroll through that history and see everything you’ve looked up.
How to delete Facebook search history on mobile devices
The easiest way to delete the most recent search entries on mobile is through the search bar. To remove older searches made within the last year, you can use the Accounts Center feature that’s built into the Facebook app.
Note: Deleted search entries are removed forever and can’t be recovered. After removal, past lookups won’t show up in your search bar, nor will you find them in the activity log or Accounts Center sections.
Delete search history via the search bar
- Open the search bar by tapping the magnifying glass icon at the top.

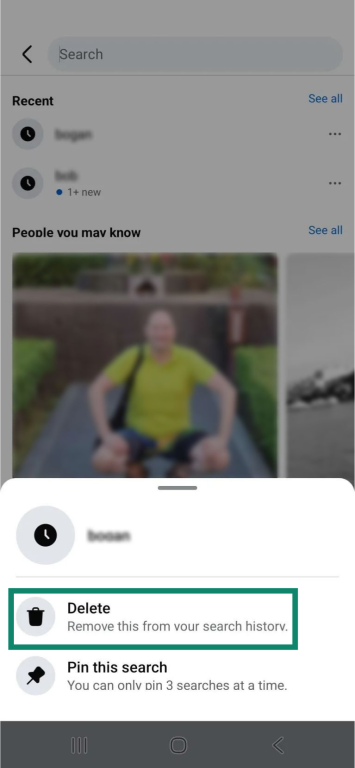
- Select the three-dot icon next to the entry you want to remove.
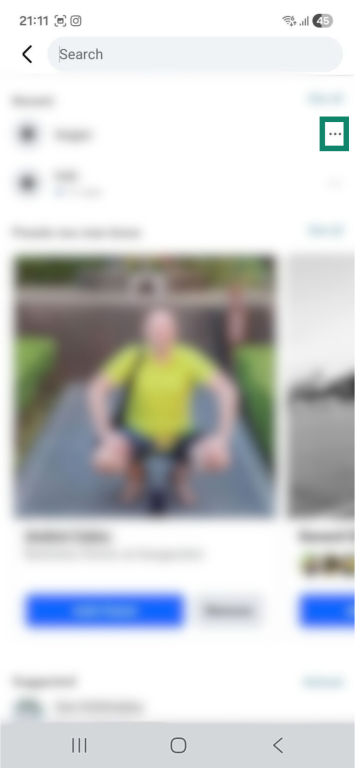
- Tap Delete.
Delete search history via the Accounts Center
Android
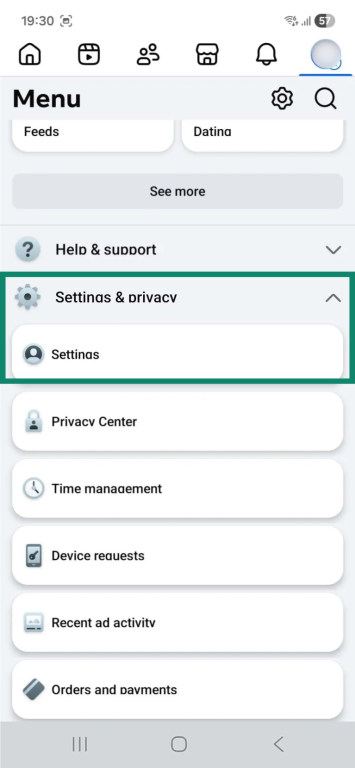
- Tap the three-line menu icon in the top right corner.
- Select Settings & privacy, then tap Settings in the dropdown menu.
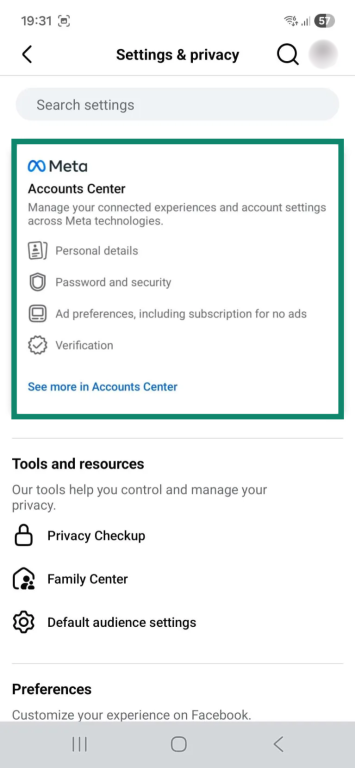
- Next, tap the Accounts Center window.
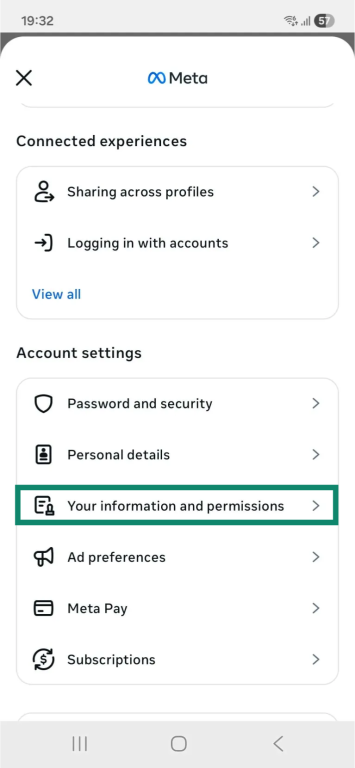
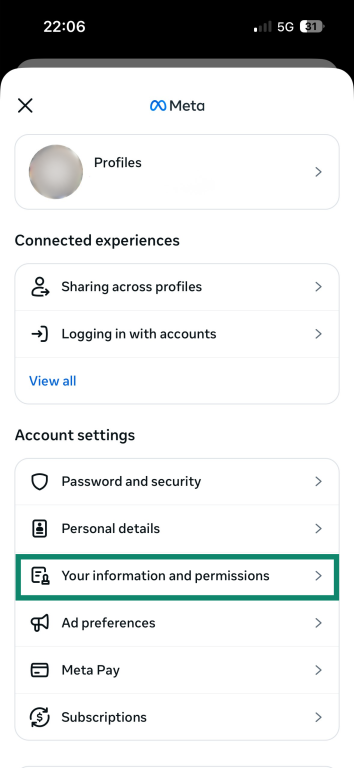
- Choose Your information and permissions.
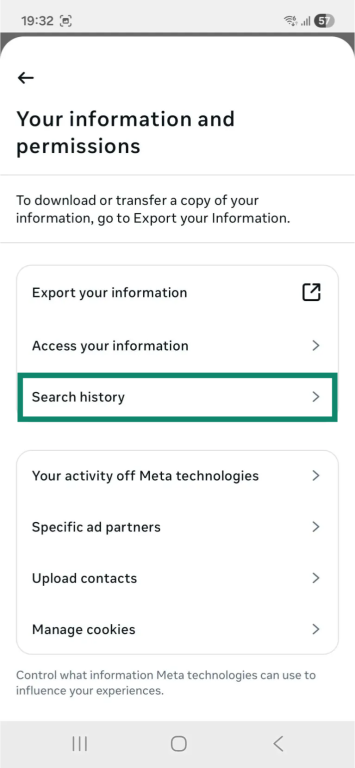
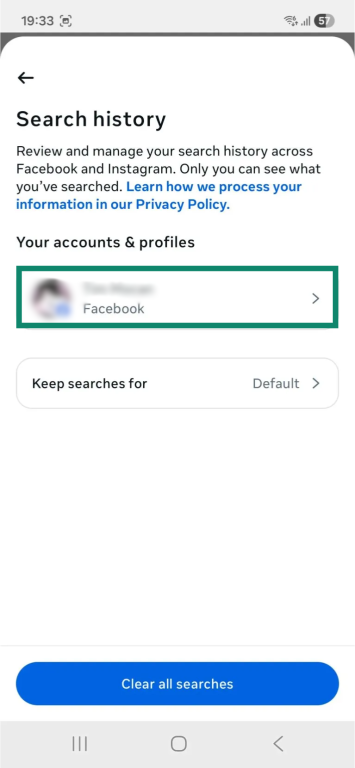
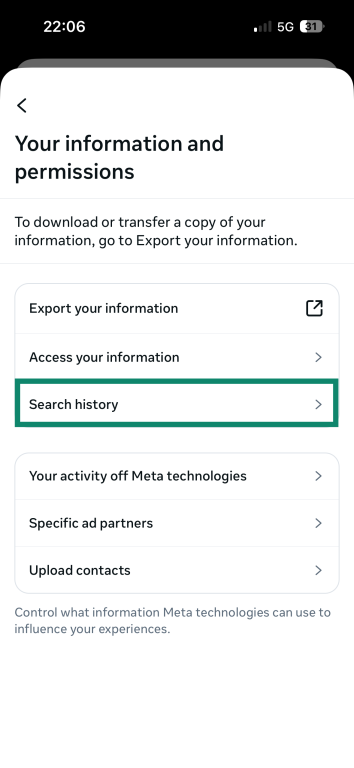
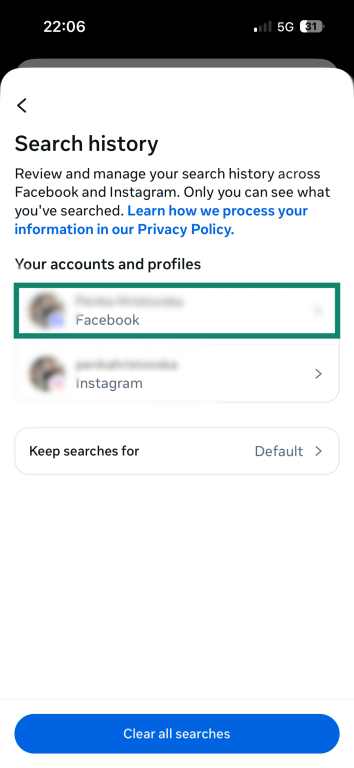
- Now, select Search history.
- Choose the Facebook account whose search history you want to clear, or choose Clear all searches to delete everything at once.
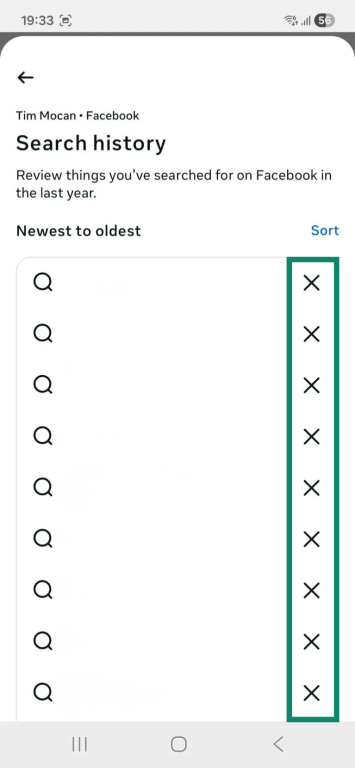
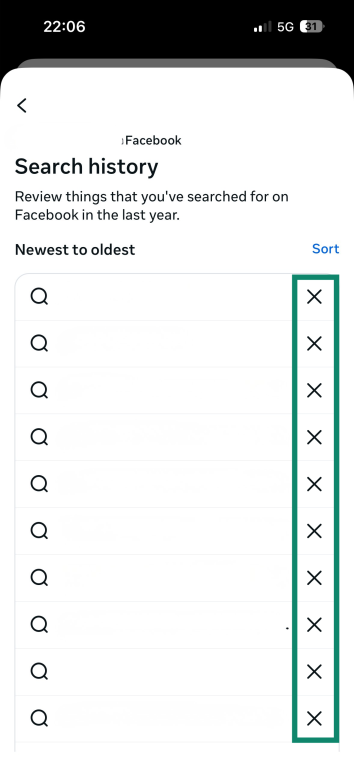
- If you’ve chosen a Facebook account, on the next screen, tap the X icon next to the search entry you want to remove.
iOS
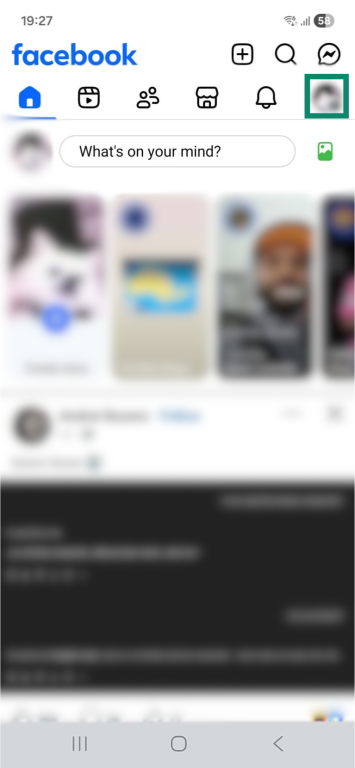
- Tap the Menu button in the lower right corner.

- Select Settings & privacy, then choose Settings.

- On the new page, tap Accounts Center.

- Choose the Your information and permissions option.
- Select Search history.
- If you want to remove all searches at once, just tap Clear all searches at the bottom of this screen. If you want to delete individual searches, pick the Facebook account whose search history you want to clear.
- Tap X next to the entry you want to delete.
How to delete Facebook search history on desktop
As on mobile, if you want to quickly remove a recent search entry, the easiest way to do that is via the search bar. To delete older entries or clear all searches simultaneously, you have to access your Facebook activity log.
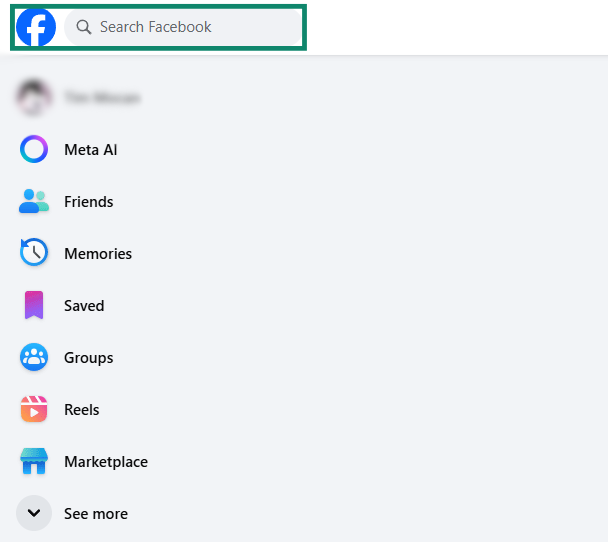
Delete recent search history using the search bar
- Click the Facebook search bar, which is located in the top left corner.
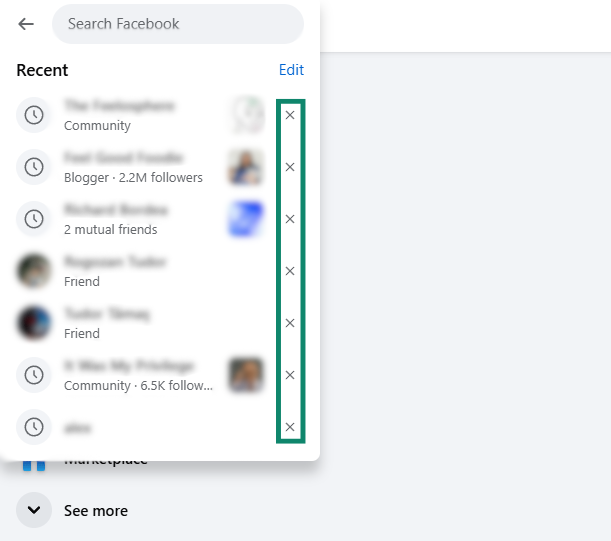
- Select the X icon next to the search entry you want to remove.
Delete an older Facebook search entry or remove in bulk
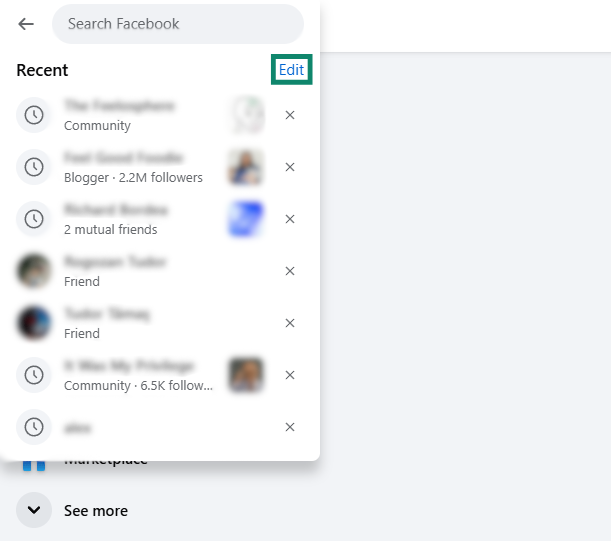
- To remove older entries or delete them in bulk, click Edit from your search bar to access your activity log.
- To delete a specific older entry, scroll until you find it, click the three-dot icon to its right, and select Delete.
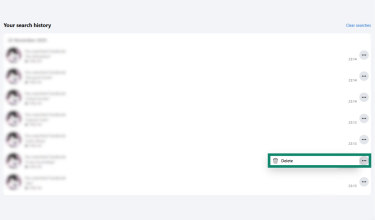
- If you want to remove all searches, click Clear searches.

Using auto-clearing settings
Facebook lets you enable auto-clearing settings, which automatically delete your search history after a chosen period. By default, Facebook auto-clears your searches after one year. The steps for enabling auto-clearing on Facebook are the same on desktop and mobile, but for the purposes of this step-by-step guide, we’re using the desktop version of Facebook:
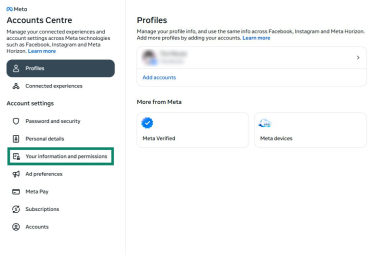
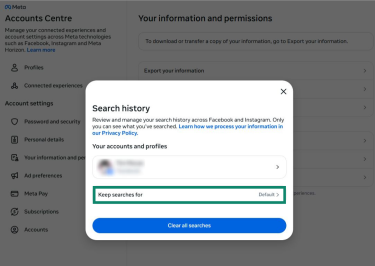
- Access the Accounts Center and select Your information and permissions.
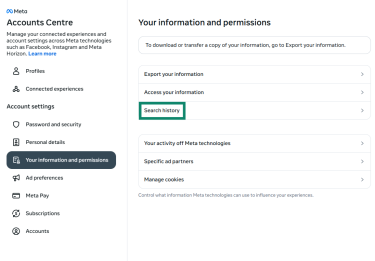
- Click the Search history option.
- Select Keep searches for.
- Choose how long you want Facebook to keep your searches: 3, 7, 14, or 30 days.
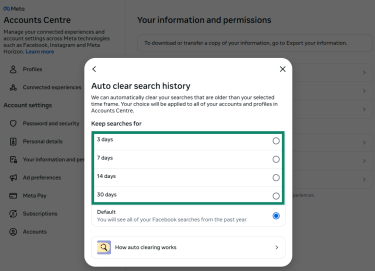
- Click Confirm.
Tips for protecting your Facebook privacy
In addition to regularly clearing your search history, there are other steps you can take to improve your Facebook privacy.
Adjust Facebook privacy settings
Facebook’s privacy settings don’t stop the platform from tracking you, but they can limit some data collection and help secure your account and profile. For example, you can:
- Adjust ad preferences: Prevent advertisers from using your profile details for ad targeting.
- Turn on two-factor authentication (2FA): Add an extra identity verification step to the login process to increase account security.
- Set up alerts for unrecognized login attempts: Get notified if someone tries to sign in from a device or location Facebook doesn’t recognize.
- Review app and site permissions: Block third-party services from accessing your non-public profile information.
- Modify profile and post visibility: Control who can see your profile, send you friend requests, or interact with your posts.
The easiest way to optimize your Facebook privacy settings is to use the platform’s Privacy Checkup feature. This is a centralized dashboard that walks you through different settings you can enable or modify to enhance your social media privacy control.
Learn more: To further strengthen your privacy, read our full guide on managing off-Facebook activity settings.
Practice good digital hygiene
Good digital can protect you from cyber threats that may lead to leaked data, stolen credentials, or compromised Facebook accounts.
- Create strong passwords: Use a password generator to create a password that’s hard to guess. It’s also a good idea to store it in a secure password manager like ExpressKeys.
- Be wary of phishing attempts: Don’t interact with suspicious messages, download unknown attachments, or click on shady links.
- Use an antivirus: This is security software that helps protect your device from malicious programs and blocks dangerous links.
- Update your devices and apps: Upgrade to the latest version, as cybercriminals often exploit unpatched security vulnerabilities.
- Secure your home network: Change your router’s default credentials, enable Wi-Fi Protected Access 3 (WPA3) or WP2 encryption, and turn on your router’s firewall.
Use Facebook with a virtual private network (VPN) for extra protection
A VPN is a privacy tool that changes your IP address, which makes it harder for Facebook to collect location-based data. It also encrypts your internet traffic, a process that turns readable data into a string of illegible symbols.
This makes it difficult for outside parties to monitor your Facebook activities. For example, when you connect to a VPN, your internet service provider (ISP) or network administrator at school or work won’t be able to see that you’re visiting Facebook. The VPN’s encryption also helps keep your connection to Facebook secure on insecure public Wi-Fi, where cybercriminals might be able to break into and spy on your traffic.
FAQ: Common questions about Facebook search history
How do I permanently delete my Facebook search history?
You can permanently clear your search history by using the search bar, going through the Accounts Center, or your Facebook activity log.
Can you delete all Facebook search history at once?
Yes, and the easiest way to do this is through the activity log on desktop or the Activity Center on mobile. On desktop, select the search bar, then click Edit. To remove all entries, click Clear searches. On mobile, go to the Accounts Center, choose Your information and permissions, and select Clear all searches.
What’s the fastest way to delete search history on a desktop?
That depends. If you want to quickly remove a recent search entry, the fastest way to do that is through the search bar. Clicking it shows the latest search entries, which you can delete with the X buttons. If you want to delete search entries in bulk or your entire search history in one click, you’ll need to go through the activity log.
Can Facebook still use deleted search data?
According to Facebook, it may still use the underlying data to personalize your search experience for up to 90 days, but after that, the platform permanently removes it. This means you can’t recover or view past searches, and it should also mean that Facebook no longer has access to them.
Can others see my Facebook search history?
Other people can only see your Facebook search history if they have access to your account. To prevent this, make sure to clear your searches before allowing someone to use your profile.
Can others see my deleted search history?
No, because deleting your Facebook search history permanently removes it. Even if someone has access to your device and account, they can’t recover deleted entries. This is why you should always clear your searches before allowing someone access to your profile.
How often should I delete my Facebook search history?
It depends on your preferences, but you can use Facebook’s auto-clearing settings to automatically delete search entries every 3, 7, 14, or 30 days. If you share your device or account with other people, you should also clear your searches before signing off so no one else can see them.
How do I access my activity log on desktop?
Accessing your Facebook activity log on desktop is simple. Click the search bar, then select the blue Edit text. This opens the activity log, where you can delete individual searches or clear your entire search history with a single click.
How do I clear my Facebook viewing history?
To delete your Facebook watch history, access the platform on desktop, open the profile menu, go to Settings & privacy, and click Activity log. Then select Videos you’ve watched, which shows your entire viewing history. To remove a single video, click the three-dot menu next to it and choose Delete. To clear all your watch history at once, select Clear Video Watch History.
Take the first step to protect yourself online. Try ExpressVPN risk-free.
Get ExpressVPN